
The igGrid is a jQuery-based client-side grid that is responsible for presenting and manipulating tabular data. Its whole lifecycle is on the client-side, which makes it independent from server-side technology.
The igGrid control supports a number of different features:
Further, the grid also includes support for:
The easiest way to add a new igGrid to your application is via the Ignite UI CLI.
To install the Ignite UI CLI:
npm install -g igniteui-cli
Once the Ignite UI CLI is installed the commands for generating an Ignite UI project, adding a new igGrid component, building and serving the project are as following:
ig new <project name>
cd <project name>
ig add grid newGrid
ig start
For more information and the list of all available commands read the Using Ignite UI CLI topic.
The following steps demonstrate how to create a basic implementation of the jQuery Grid on a web page using either jQuery client code. To read about which implementation to choose, see Ignite UI for jQuery Overview.
To get started, include the required and localized resources for your application. Details on which resources to include can be found in the Using JavaScript Resources in Ignite UI for jQuery help topic.
On your HTML page, reference the required JavaScript and CSS files. In HTML:
<script src="scripts/jquery.js" type="text/javascript"></script>
<script src="scripts/jquery-ui.js" type="text/javascript"></script>
<script src="scripts/infragistics.core.js" type="text/javascript"></script><script src="scripts/infragistics.lob.js" type="text/javascript"></script>
<link href="css/themes/infragistics/infragistics.theme.css" rel="stylesheet" type="text/css" />
<link href="css/structure/infragistics.css" rel="stylesheet" type="text/css" />
Next, reference the JSON array which serves as a data source for the grid is added.
 <!--Sample JSON Data-->
 <script src="http://www.igniteui.com/data-files/northwind.js"></script>
Define a table DOM element, that igGrid will use to render the given data.
In HTML:
 <div style="height:300px;">
     <table id="grid"></table>
 </div>
Once the above setup is complete, begin to set options including ID, columns and dataSource.
columns – the column object definition for igGrid
headerText – the text in the header of a column. HTML tags should be avoided, as they might cause misbehavior in some features.key – the name of the key field in the data sourcedataType – the data type of a column. Could be “string”, “number” or “date”dataSource – the data that the igGrid is displaying data for. Options include:
In Javascript:
$(function () {
    $("#grid").igGrid({
        autoGenerateColumns: false,
        renderCheckboxes: true,
        primaryKey: "EmployeeID",
        columns: [{
            // note: if primaryKey is set and data in primary column contains numbers,
            // then the dataType: "number" is required, otherwise, dataSource may misbehave
            headerText: "Employee ID", key: "EmployeeID", dataType: "number"
        },
        {
            headerText: "First Name", key: "FirstName", dataType: "string"
        },
        {
            headerText: "Last Name", key: "LastName", dataType: "string"
        },
        {
            headerText: "Title", key: "Title", dataType: "string"
        },
        {
            headerText: "Birth Date", key: "BirthDate", dataType: "date"
        },
        {
            headerText: "Postal Code", key: "PostalCode", dataType: "string"
        },
        {
            headerText: "Country", key: "Country", dataType: "string"
        }
        ],
        dataSource: northwind,
        dataSourceType: "json",
        responseDataKey: "results",
        height: "100%",
        width: "100%",
        tabIndex: 1,
        features: [
            {
                name: "Selection",
                mode: "row",
                multipleSelection: true
            },
            {
                name: "Paging",
                pageSize: 5
            },
            {
                name: "Filtering"
            }
        ]
    });
});
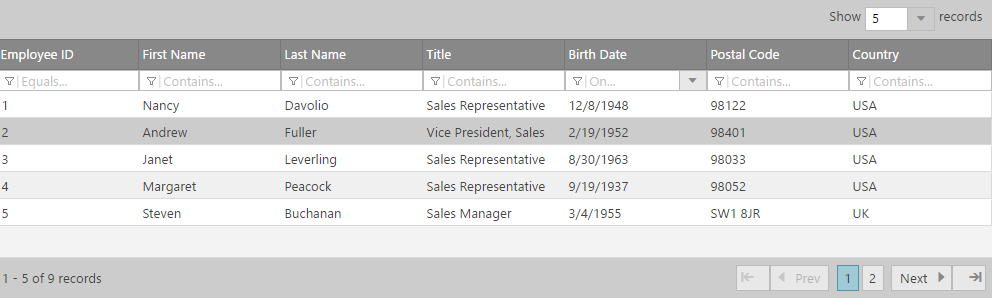
Run the web page. The igGrid binds to the JSON array and displays the data.

Working sample
View on GitHub