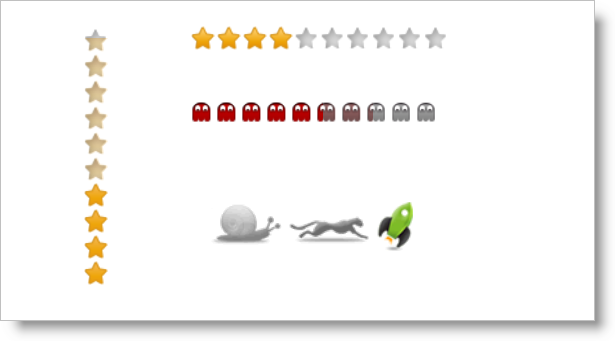
The jQuery Rating control, or igRating, allows you to select and rate items from a given range of values. Although it seems like a simple control, igRating is very flexible. It has a rich API that allows you to change its appearance and behavior, so you can respond to client actions and change control dynamically. This topic lists all the features and illustrates how to create a simple igRating control.
The jQuery Rating control is part of the Ignite UI for jQuery packet, which contains client-side-only controls. This gives the developer the flexibility to choose from several implementation options when developing using the jQuery Rating. The rating control exposes a rich jQuery API that can be configured without the use of any specific server back end. Also, developers using the Microsoft® ASP.NET MVC framework can leverage the rating’s server-side wrapper to configure the control with their .NET™ language of choice.
The jQuery Rating allows itself to be styled, providing a different look and feel to the control. Styling the jQuery Rating provides a consistent appearance across supported browsers. The jQuery Rating can utilize your existing style sheets and can be styled using the jQuery UI’s ThemeRoller.

The following steps demonstrate how to create a basic implementation of the jQuery Rating on a webpage using either jQuery client code or ASP.NET MVC server code.
To read about which implementation to choose, see Ignite UI for jQuery Overview. The following screenshot shows the default Rating view.

On your HTML page or ASP.NET MVC View, reference the required JavaScript files, CSS files, and ASP.NET MVC assemblies.
In HTML:
<link type="text/css" href="/css/themes/infragistics/infragistics.theme.css" rel="stylesheet" />
<link type="text/css" href="/css/structure/infragistics.css" rel="stylesheet" />
<script type="text/javascript" src="/Scripts/jquery-1.4.4.min.js"></script>
<script type="text/javascript" src="/Scripts/jquery-ui.min.js"></script>
<script type="text/javascript" src="/Scripts/Samples/infragistics.core.js"></script><script type="text/javascript" src="/Scripts/Samples/infragistics.lob.js"></script>
In ASPX:
<%@ Import Namespace="Infragistics.Web.Mvc" %>

<link type="text/css" href="<%= Url.Content("~/css/themes/infragistics/infragistics.theme.css") %>" rel="stylesheet" />
<link type="text/css" href="<%= Url.Content("~/css/structure/infragistics.css") %>" rel="stylesheet" />

<script type="text/javascript" src="<%= Url.Content("~/Scripts/jquery-1.4.4.min.js") %>"></script>
<script type="text/javascript" src="<%= Url.Content("~/Scripts/jquery-ui.min.js") %>"></script>
<script type="text/javascript" src="<%= Url.Content("~/Scripts/Samples/infragistics.core.js") %>"></script><script type="text/javascript" src="<%= Url.Content("~/Scripts/Samples/infragistics.lob.js") %>"></script>
In Razor:
@using Infragistics.Web.Mvc;

<link type="text/css" href="@Url.Content("~/css/theme/infragistics/infragistics.theme.css")" rel="stylesheet" />
<link type="text/css" href="@Url.Content("~/css/structure/infragistics.css")" rel="stylesheet" />

<script type="text/javascript" src="@Url.Content("~/Scripts/jquery-1.4.4.min.js")"></script>
<script type="text/javascript" src="@Url.Content("~/Scripts/jquery-ui.min.js")"></script>
<script type="text/javascript" src="@Url.Content("~/Scripts/Samples/infragistics.core.js")"></script><script type="text/javascript" src="@Url.Content("~/Scripts/Samples/infragistics.lob.js")"></script>
For jQuery implementations, define a div as the target element in HTML. This step is optional for ASP.NET MVC implementations.
In HTML:
<div id="igRating1"></div>
Once the above setup is complete, begin to set options including ID, vote height, precision, and value presentation. Note that in ASP.NET MVC Views, the Render method must be called after all other options are set.
In jQuery:
<script type="text/javascript">
    $("#igRating1").igRating({
        voteCount: 10,
        valueAsPercent: false,
        value: 4,
        precision: "exact"
    });
</script>
In ASPX:
<%= Html.Infragistics().Rating()
    .ID("igRating1")
    .VoteCount(10)
    .ValueAsPercent(false)
    .Value(4)
    .Precision(RatingPrecision.Exact)
    .Render() %>
In Razor:
@(  Html.Infragistics().Rating()
    .ID("igRating1")
    .VoteCount(10)
    .ValueAsPercent(false)
    .Value(4)
    .Precision(RatingPrecision.Exact)
    .Render()
)
Run the web page and you will get the basic Rating control.
View on GitHub