
This topic demonstrates how to add the igRadialGauge™ control to a web page and bind it to data.
The following lists the materials required as a prerequisite to understanding this topic.
Topics
Ignite UI for jQuery Overview: General information on the Ignite UI for jQuery™ library.
Using JavaScript Resources in Ignite UI for jQuery: This topic provides general guidance on adding required JavaScript resources to use controls from the Ignite UI for jQuery library.
igRadialGauge Overview: This topic provides conceptual information about the igRadialGauge control including its main features, minimum requirements for using charts and user functionality.
This topic contains the following sections:
This procedure guides you through the process of adding a radial gauge control to a web page.
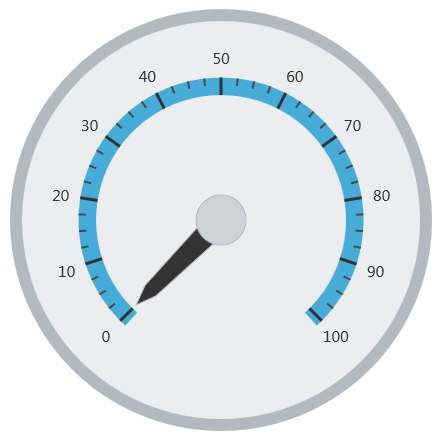
The following screenshot is a preview of the final result.
This topic takes you step-by-step toward adding a radial gauge to a web page The following is a conceptual overview of the process:
Adding references to the required resources
igLoaderAdd HTML markup required by the igRadialGauge
The following steps demonstrate how to add an igRadialGauge control to a web page.
Add references to the required resources.
Overview
Reference the required resources. Referencing resources includes:
Adding the Ignite UI for jQuery JavaScript files to a folder named Scripts/ig in your web site or web application (see the Using JavaScript Resources in Ignite UI for jQuery topic for details).
The resources can be added either manually or using loaders (recommended).
Referencing resources in JavaScript using the igLoader
The igLoader™ control is the recommended way to load JavaScript and CSS resources required by the Ignite UI for jQuery library controls. First the igLoader script must be included in the page:
In HTML:
<script type="text/javascript" src="Content/ig/infragistics.loader.js"></script>
For HTML views the igLoader must be instantiated this way:
In HTML:
<script type="text/javascript">
$.ig.loader({
    scriptPath: "Scripts/ig/",
    cssPath: "Content/ig/",
    resources: "igRadialGauge"
});
<script>
The resources option specifies that the igRadialGauge control will be rendered.
Add HTML markup required by the igRadialGauge.
HTML example
Add the div elements for the radial gauge which will be referred in the gauge instantiation code.
In HTML:
<div id="gauge" class="gaugeContainer"></div>
Instantiate the radial gauge.
HTML example
For the gauge div tags to be wrapped and the gauge drawn, the igRadialGauge control must be instantiated and its main options set. Add the code below to the existing code in the <script> tag used above for data array definition:
In Javascript:
 $(function () {
     $("#gauge").igRadialGauge({
         width: "450px",
         height: "450px"
     });
 });
(Optional) Verify the result.
To verify the result, save the page and view the final result in a web browser. The radial gauge should render as shown in the Preview.
The following topics provide additional information related to this topic:
Configuring the Background (igRadialGauge): This topic provides a conceptual overview of the igRadialGauge™ control’s backing feature. It describes the properties of the backing area and provides an example of its implementation.
Configuring Labels (igRadialGauge): This topic provides a conceptual overview of labels with the igRadialGauge™ control. It describes the properties of the labels and also provides an example of how to configure the labels.
Configuring Needles (igRadialGauge): This topic provides a conceptual overview of needles with the igRadialGauge™ control. It describes the properties of the needles and also provides an example of how to configure them.
Configuring Ranges (igRadialGauge): This topic provides a conceptual overview of the igRadialGauge™ control’s ranges. It describes the properties of the ranges and provides an example of how to add ranges to the radial gauge.
Configuring the Scales (igRadialGauge): This topic provides a conceptual overview of the igRadialGauge™ control’s scale. It describes the properties of the scale and also provides an example of how to implement it.
Configuring the Tick Marks (igRadialGauge): This topic provides a conceptual overview of tick marks with the igRadialGauge™ control. It describes the tick marks’ properties and provides an example of how to implement them.
The following samples provide additional information related to this topic.
API Usage: The buttons and api-viewer showcase some of igRadialGauge's needle methods. You can change the value of the needle at runtime and obtain the current value of the needle by clicking the corresponding buttons.
Gauge Animation: This sample demonstrates how you can easily animate the Radial Gauge by setting the transitionDuration property.
Gauge Needle: Displayed as a pointer, the Needle indicates a single value on a scale. The options pane below allows you to interact with the Radial Gauge control’s Needle.
Label Settings: This sample demonstrates how to configure the Radial Gauge control’s Label settings. Use the slider to see how the labelInterval and labelExtent properties affect the Label.
Needle Dragging: This sample demonstrates how you can drag the Radial Gauge control’s needle by using the Mouse events.
Range: A range is a visual element that highlights a specified range of values on a scale. Use the options pane below to set the Radial Gauge control’s Range properties.
Scale Settings: A scale defines a range of values in the Radial Gauge. Use the options pane below to set the Radial Gauge control’s Scale properties.
Tick Marks: Tick marks can be displayed at every user specified interval on a gauge. Use the options pane below to set the Radial Gauge control’s Tick Mark properties.
View on GitHub