
This topic explains how to configure the features and behavior of the igTileManager™ control.
The following topics are prerequisites to understanding this topic:
igTileManager Overview: This topic provides conceptual information about the igTileManager control including its main features, minimum requirements, and user functionality.
Adding igTileManager: This topic demonstrates, with code examples, how to add the igTileManage control to an HTML page in either JavaScript or ASP.NET MVC.
Binding igTileManager to Data: This topic explains how to bind the igTileManager control to the supported data sources.
This topic contains the following sections:
The main configurable aspects of the igTileManager control are the:
Each of these aspects is explained in Configuring igTileManager.
The following table lists the configurable aspects of the igTileManager control. Further details about most of the aspects are available in the sections following this summary table.
| Configurable aspect | Details | JavaScript properties | ASP.NET MVC properties | |
|---|---|---|---|---|
| Number of rows and columns | Number of rows | The number of rows and columns to be rendered in the tile grid is configurable. | ||
| Number of columns | ||||
| Individual columns | Column height | The width and height of the columns in the tile grid are configurable. | ||
| Column width | ||||
| Tile left margin | The top and left margins for each tile in the tile grid are configurable. | |||
| Tile top margin | ||||
| Operational mode | Number of panels and placement of the maximized tile | You can specify whether to display the maximized tile in a separate panel or in the same panel together with the minimized tiles. In the latter case, the position of the maximized tile inside the panel is configurable. | ||
| Item position and span | Item position | The position of an item in the tile grid can be configured be specifying the row and indexes of the desired position. | ||
| Item size | Items can be configured to span over several rows and columns to accommodate larger items. | |||
| Tile states | Minimized state | Tile state is configured individually for each state. | ||
| Maximized state | ||||
| Tiles’ margins | Top margin | The top and the left margin of the minimized tiles are configurable thus forming an outset between the tiles. | ||
| Left margin | ||||
| Minimized Tiles panel | Number of columns | The number of columns to be rendered in the Minimized Tiles panel is configurable. | ||
| Minimized tiles’ width | The width of the tiles in the Minimized Tiles panel is configurable. | |||
| Minimized tiles’ height | The height of the tiles in the Minimized Tiles panel is configurable. | |||
| Scrollbar | You can specify whether the Minimized Tiles panel should expose a scrollbar if the tiles are overflowing. When the scrollbar is disabled, the user might need to move the splitter to display the tiles that are out of sight. | |||
| Splitter bar visibility | You can specify whether the splitter to be shown or not. By default, the splitter bar is visible. | |||
| Animated transitions’ duration | Transition duration upon container re-size |
The duration of the animated transitions, upon both container re-sizing and changing the tile state (minimizing/maximizing) is configured with the animationDuration option and, consequently, always have same durations.
|
||
| Transition duration upon tile minimizing/maximizing | ||||
| User interaction | Maximization trigger |
You can specify elements of a minimized tile that will not trigger maximizing. By default, clicking on and <a> and <inputs> tags does not trigger maximizing.
|
||
The number of rows and columns to be rendered in the tile grid is configurable. If the number of rows and columns is not specified, then they will be calculated to best fit the tiles in the container.
The cols and rows options set the number of rows and columns of the entire container, irrespective of the operational mode (Dual Panel or Single Panel).
In Dual Panel mode, from this total number of columns, the rightPanelCols option reserves a certain number of columns for the Minimized Tiles panel to accommodate the minimized tiles and, consequently, pre-define the breadths of the Minimized Tiles panel and Maximized tiles panel. Keep in mind that the Maximized Tile panel must preserve a minimum width equal to the columnWidth setting so the rightPanelCols value must be no larger than cols-1 (in order to reserve at least one grid column for the Maximized Tile panel).
The rightPanelCols option has effect only in Dual Panel mode.
The width and height of the columns in the tile grid are configurable.
By default, the tile manager is rendering tiles of equal size to fit in the container using the entire available space. When columnWidth or columnHeight is set, the igTileManager renders the configuration according to this setting and calculates the rest of the options to fit the tiles in the container and use the remaining space.
The top and left margins for each tile in the tile grid are configurable. The default configuration does not include any margins.
The columnWidth or columnHeight options can be set either in pixels or in percentages. The choice of dimensioning affects the rendering logic of the columns:
You can have both the cols/rows options, on one side, and columnWidth/columnHeight options, on the other, defined at the same time. In this case, the number of tiles on the row is set according to the cols option value and each tile has its size defined according to the columnWidth option value. If the total width of all tiles on the same row is larger than the container's width, a horizontal scrollbar will be rendered.
Note: For your convenience, when setting the
columnWidth/columnHeightin percentages, the value include the left and top margins. For example, if the container is 1000 px wide and thecolumnWidthis set to ‘50%’, the width of each tile will be 500 px. But ifmarginLeft: 50px is added, the width of the tile will be 450 px. This makes it easier to work with tile widths/heights using percentages.
Also, if the container has a scrollbar – it will not be counted as part of the container's width or height. Thus, having the same example container of 1000 px width with a scrollbar and columnWidth: ‘50%’ and no margins, will result in tiles that are less than 500 px wide.
The position of an item in the tile grid can be configured by specifying the row and indexes of the desired position. Also, items can be configured to span over several rows and columns to accommodate larger items. Each tile's position and size can be specified separately by providing the items option. The items option takes array with the settings each tile's position and size
The following table explains the options for configuring the items positions and sizes.
| Property | Description |
|---|---|
| rowIndex | The starting row position of the tile. |
| colIndex | The starting column position of the tile. |
| rowSpan | The number of rows for the tile to span over. |
| colSpan | The number of columns for the tile to span over. |
The item position and size configuration has higher priority over the column configuration and overrides it.
The look of the minimized tiles that are placed in the Minimized Tiles panel is also configurable. You can define in how many columns the minimized tiles should be placed (using the rightPanelCols option), as well as the height and width of the tiles in the Minimized Tiles panel (using rightPanelTilesHeight and rightPanelTilesWidth options respectively).
Tile state is configured individually for each state through the minimizedState and maximizedState options. Tile state configuring has certain specifics depending on how you instantiate the igTileManager control:
igTileManager on a data source, provide an igTemplating™ string for the minimizedState and maximizedState options, otherwise no content will be rendered in the tile.igTileManager on the HTML markup, provide jQuery selectors for the minimizedState and maximizedState options to specify the content to be rendered in the respective state. When any of these options is not specified then the whole content of the tile will be shown in the according state.The margins of the minimized tiles define the space around each tile in the grid. The top and the left margin of the minimized tiles are configurable thus forming an outset between the tiles. Tiles’ margins are configured with the marginTop and marginLeft options.
Configuring tile margins’ values affects the sizes of the tiles. When calculating the tiles' width, the total width of the margins is subtracted from the width of the container and the width of the tiles is calculated based on the remaining width. For example, if the container has a width of 800 px and there are 4 tiles on each row, the width of the tiles is set relatively to the width of the container and the left margin of the tiles is set to 10 px, then the width of each tile will be 25% of 760 px (800 – (4 x 10) = 760).
You can disable scrolling in the Minimized Tiles panel. To hide the Minimized Tiles panel scrollbar, set the showRightPanelScroll option to false. When the scrollbar is not present and there are tiles in the Minimized Tiles panel that are out of sight, the only way for the user to display those tiles would be to move the splitter.
You can also hide the splitter bar to prevent the user from resizing the panels. To hide the splitter bar,,set the showSplitter option to false.
The durations of the animated transitions, upon container resizing and changing the tile state (minimizing/maximizing) are configured with a single option – animationDuration – which setting is applied to both animations The animationDuration is set in milliseconds and its default value is 500. Animated durations can be disabled by setting this option to 0.
Default configuration summary
With its default settings, the igTileManager control renders tiles with items from markup and without left and top margin. All tiles fit in the container in equal number of columns and rows depending on the number of the tiles. The default configuration does not include any margins.
The following table lists the code examples included in this topic.
| Example | Description |
|---|---|
| Configuring a Specific Number of Rows and Columns | This example demonstrates how to configure an igTileManager control to render a tile grid with a specified number of columns, rows, and margins from the HTML markup. |
| Configuring column dimensions | This example demonstrates how to configure an igTileManager control to render a tile grid with specified columns’ dimensions and margins from the HTML markup. |
| Configuring Tiles with Custom Positions and Spans | This example demonstrates how to configure an igTileManager control to render a tile grid with items that are custom-positioned individually. |
| Configuring Custom Tiles | This example demonstrates how to configure an igTileManager control to render a tile grid with custom minimized and maximized tile states. |
| Configuring the Minimized Tiles Panel | This example demonstrates how to configure the Minimized Tiles panel with a custom layout. |
| Configuring the Duration of the Animated Transitions | This example demonstrates how to configure the igTileManager‘s animated transitions for both container resizing and tile minimizing/maximizing. |
This example demonstrates how to configure an igTileManager control to
render a tile grid with a specified number of columns, rows, and margins
from the HTML markup.
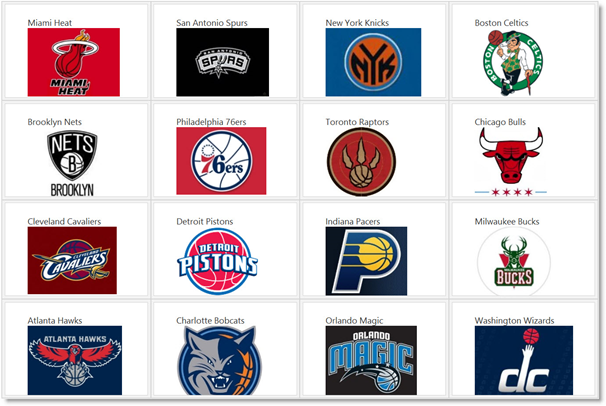
The example configures the igTileManager control with 800 px height and 100% of the window`s width. The tiles are placed in a 5-column, 4-row grid. The left and top tile margins are set to 10 px. This means that every tile will have 190 px height and the tiles will be outset at 10 px from each other. The tiles` width is calculated depending on the container's size.
The tiles are configured to be all in minimized state at control rendering. This means that only the team logos will be visible initially. If the user clicks any of the tiles, it will expand and some statistics about the team will be displayed.
Following is the code that implements this example.
In HTML:
<style type="text/css">
        #dashboard {
            position: relative;
            width: 100%;
            height: 800px;
        }
</style>
<div id="dashboard">
        <div>
           <figure class="minimized">
               <img src="miami-logo.jpg" alt="error">
            </figure>
           <div class="maximized">
              <img src="miami-maximized.jpg" alt="error">
               <ul>
                  <li>Top scorer: LeBron James - 25,9 PPG</li>
                  <li>Most rebounds per game: LeBron James - 8.40 TOT</li>
                  <li>Highest three point percentage: James Jones - 0.750</li>
               </ul>
           </div>
         </div>
         <div>
            <figure class="minimized">
               <img src="San-Antonio-logo.jpg" alt="error">
            </figure>
           <div class="maximized">
              <img src="San-Antonio-maximized.jpg" alt="error">
               <ul>
                  <li>Top scorer: Tony Parker - 20,3 PPG</li>
                  <li>Most rebounds per game: Tim Duncan - 9.90 TOT</li>
                  <li>Highest three point percentage: Matt Bonner - 0.442</li>
               </ul>
           </div>
         </div>
                ...
         <div>
            <figure class="minimized">
               <img src="wizards-logo.jpg" alt="error">
            </figure>
            <div class="maximized">
              <img src="wizards-maximized.jpg" alt="error">
               <ul>
                  <li>Top scorer: John Wall - 18,5 PPG</li>
                  <li>Most rebounds per game: Emeka Okafor - 8,80 TOT</li>
                  <li>Highest three point percentage: Martell Webster - 0.422</li>
               </ul>
           </div>
         </div>
</div>
In JavaScript:
$("#dashboard").igTileManager({
   cols: 5,
   rows: 4,
   marginLeft: 10,
   marginTop: 10,
   minimizedState: ".minimized",
   maximizedState: ".maximized"
});
This example demonstrates how to configure an igTileManager control to render a tile grid with specified columns’ dimensions and margins from the HTML markup.
The example configures the igTileManager control with 800 px height and 100% of the window's width. The columns in the tile manager each have 250 px height and 250 px width. The number of columns and rows in the grid depends on the size of the container. The left and top margins of the tiles are set to 10 px.
The tiles are configured to be all in minimized state at control rendering. This means that only the team logos will be visible initially. If the user clicks any of the tiles, it will expand and some statistics about the team will be displayed.
Following is the code that implements this example.
In HTML:
<style type="text/css">
        #dashboard {
            position: relative;
            width: 100%;
            height: 800px;
        }
</style>
<div id="dashboard">
        <div>
           <figure class="minimized">
               <img src="miami-logo.jpg" alt="error">
            </figure>
           <div class="maximized">
              <img src="miami-maximized.jpg" alt="error">
               <ul>
                  <li>Top scorer: LeBron James - 25,9 PPG</li>
                  <li>Most rebounds per game: LeBron James - 8.40 TOT</li>
                  <li>Highest three point percentage: James Jones - 0.750</li>
               </ul>
           </div>
         </div>
         <div>
            <figure class="minimized">
               <img src="San-Antonio-logo.jpg" alt="error">
            </figure>
           <div class="maximized">
              <img src="San-Antonio-maximized.jpg" alt="error">
               <ul>
                  <li>Top scorer: Tony Parker - 20,3 PPG</li>
                  <li>Most rebounds per game: Tim Duncan - 9.90 TOT</li>
                  <li>Highest three point percentage: Matt Bonner - 0.442</li>
               </ul>
           </div>
         </div>
                ...
         <div>
            <figure class="minimized">
               <img src="wizards-logo.jpg" alt="error">
            </figure>
            <div class="maximized">
              <img src="wizards-maximized.jpg" alt="error">
               <ul>
                  <li>Top scorer: John Wall - 18,5 PPG</li>
                  <li>Most rebounds per game: Emeka Okafor - 8,80 TOT</li>
                  <li>Highest three point percentage: Martell Webster - 0.422</li>
               </ul>
           </div>
         </div>
</div>
In JavaScript:
$("#dashboard").igTileManager({
   columnWidth: 250,
   columnHeight: 250,
   marginLeft: 10,
   marginTop: 10,
   minimizedState: ".minimized",
   maximizedState: ".maximized"
});
This example demonstrates how to configure an igTileManager control to
render a tile grid with items that are custom-positioned individually.

Following is the code that implements this example.
In HTML:
<style type="text/css">
        #dashboard {
            position: relative;
            width: 100%;
            height: 800px;
        }
</style>
<div id="dashboard">
        <div>
           <figure class="minimized">
               <img src="miami-logo.jpg" alt="error">
            </figure>
           <div class="maximized">
              <img src="miami-maximized.jpg" alt="error">
               <ul>
                  <li>Top scorer: LeBron James - 25,9 PPG</li>
                  <li>Most rebounds per game: LeBron James - 8.40 TOT</li>
                  <li>Highest three point percentage: James Jones - 0.750</li>
               </ul>
           </div>
         </div>         <div>
            <figure class="minimized">
               <img src="San-Antonio-logo.jpg" alt="error">
            </figure>
           <div class="maximized">
              <img src="San-Antonio-maximized.jpg" alt="error">
               <ul>
                  <li>Top scorer: Tony Parker - 20,3 PPG</li>
                  <li>Most rebounds per game: Tim Duncan - 9.90 TOT</li>
                  <li>Highest three point percentage: Matt Bonner - 0.442</li>
               </ul>
           </div>
         </div>
         <div>
          <figure class="minimized">
            <img src="NY-logo.jpg" alt="error">
          </figure>
        <div class="maximized">
            <img src="ny-maximized.jpg" alt="error">
              <ul>
                 <li>Top scorer: Carmelo Anthony - 28.7 PPG</li>
                 <li>Most rebounds per game: Tyson Chandler - 10.70 TOT</li>
                 <li>Highest three point percentage: Steve Novak - 0.425</li>
              </ul>
         </div>
         </div>
         <div>
            <figure class="minimized">
               <img src="boston-logo.jpg" alt="error">
            </figure>
            <div class="maximized">
              <img src="boston-maximized.jpg" alt="error">
               <ul>
                  <li>Top scorer: Jeff Green - 20.3 PPG</li>
                  <li>Most rebounds per game: Kevin Garnett - 13.70 TOT</li>
                  <li>Highest three point percentage: Jeff Green - 0.455</li>
               </ul>
           </div>
         </div>
</div>
In JavaScript:
$("#dashboard").igTileManager({
       items: [
          { rowIndex: 0, colIndex: 0, rowSpan: 1, colSpan: 2 },
         { rowIndex: 1, colIndex: 0, rowSpan: 1, colSpan: 1 },
         { rowIndex: 1, colIndex: 1, rowSpan: 2, colSpan: 1 },
         { rowIndex: 2, colIndex: 0, rowSpan: 1, colSpan: 1 }
       ],
       minimizedState: ".minimized",
       maximizedState: ".maximized"
});
This example demonstrates how to configure the igTileManager control to render a tile grid with custom minimized and maximized tile states. Both alternatives for instantiating the control – on the data source and in the HTML markup are covered.
Following is the code that implements this example when initializing the tile grid on the data source:
In JavaScript:
$("#dashboard").igTileManager({
    dataSource: dataSource,
    minimizedState: '<h3>${name} - Minimized</h3>',
    maximizedState: '<h3>${name} - Maximized</h3>'
});
Following is the code that implements this example when initializing the tile grid in the HTML markup:
In JavaScript:
$("#dashboard").igTileManager({
    dataSource: ,
    minimizedState: '.minimized',
    maximizedState: '.maximized'
});
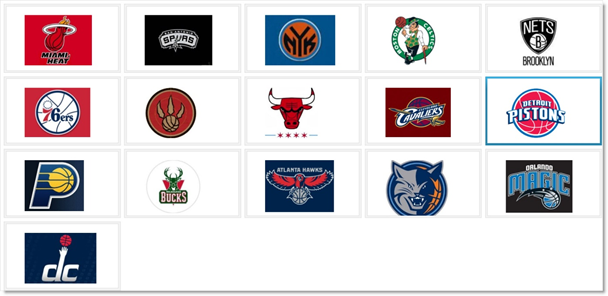
This example demonstrates how to configure the Minimized Tiles panel with a custom layout.
In the example, upon selecting a tile and maximizing it, the minimized tiles are re-grouped into two columns in the Minimized Tiles panel. The splitter bar is disabled.
Following is the code that implements this example.
In HTML:
<style type="text/css">

        #dashboard {

            position: relative;

            width: 100%;

            height: 800px;

        }

</style>

<div id="dashboard">

        <div>

           <figure class="minimized">

               <figcaption>Miami Heat</figcaption>

               <img src="miami-logo.jpg" alt="error">

            </figure>

           <div class="maximized">

              <img src="miami-maximized.jpg" alt="error">

               <ul>

                  <li>Top scorer: LeBron James - 25,9 PPG</li>

                  <li>Most rebounds per game: LeBron James - 8.40 TOT</li>

                  <li>Highest three point percentage: James Jones - 0.750</li>

               </ul>

           </div>

         </div>

         <div>

            <figure class="minimized">

               <figcaption>San Antonio Spurs</figcaption>

               <img src="San-Antonio-logo.jpg" alt="error">

            </figure>

           <div class="maximized">

              <img src="San-Antonio-maximized.jpg" alt="error">

               <ul>

                  <li>Top scorer: Tony Parker - 20,3 PPG</li>

                  <li>Most rebounds per game: Tim Duncan - 9.90 TOT</li>

                  <li>Highest three point percentage: Matt Bonner - 0.442</li>

               </ul>

           </div>

         </div>

         <div>

            <figure class="minimized">

               <figcaption>Boston Celtics</figcaption>

               <img src="boston-logo.jpg" alt="error">

            </figure>

            <div class="maximized">

              <img src="boston-maximized.jpg" alt="error">

               <ul>

                  <li>Top scorer: Jeff Green - 20.3 PPG</li>

                  <li>Most rebounds per game: Kevin Garnett - 13.70 TOT</li>

                  <li>Highest three point percentage: Jeff Green - 0.455</li>

               </ul>

           </div>

         </div>

</div
In JavaScript:
$("#dashboard").igTileManager({
    rightPanelCols: 2,
    rightPanelTilesWidth: 100,
    rightPanelTilesHeight: 100,
    showSplitter: false
});
This example demonstrates how to configure the igTileManager‘s animated transitions for both container resizing and tile minimizing/maximizing.
The example configures animated transitions to take 2000 milliseconds.
Following is the code that implements this example.
In JavaScript:
$("#dashboard").igTileManager({
    animationDuration: 2000,
    columnWidth: 250,
    columnHeight: 250
});
The following topics provide additional information related to this topic.
Handling Events (igTileManager): This topic explains, with code examples, how to attach event handlers to the igTileManager control.
Accessibility Compliance (igTileManager): This topic explains the accessibility features of the igTileManager control and provides information on how to achieve accessibility compliance for pages containing this control.
Known Issues and Limitations (igTileManager): This topic provides information about the known issues and limitations of the igTileManager control and the available workarounds for them.
jQuery and MVC API Links (igTileManager): This topic provides links to the API reference documentation for the jQuery and its ASP.NET MVC helper class for the igTileManager control.
The following sample provides additional information related to this topic.
Tile Manager Binding to JSON Data: This sample demonstrates binding igTileManager control to JSON data source.
Tile Manager Item Configurations: This sample demonstrates configuring the tiles inside the igTileManager in terms of position and size.
View on GitHub