
This topic describes how to add a button to a custom toolbar in the igHtmlEditor™.
The following topics are prerequisites to understanding this topic:
igHtmlEditor Overview: This topic describes the features of the igHtmlEditor.
Adding igHtmlEditor: This topic describes how to add an igHtmlEditor to a web page.
Configuring Toolbars and Buttons: This topic explains how to configure igHtmlEditor toolbars and buttons.
Configuring Custom Toolbars: This topic describes how to configure a custom toolbar for the igHtmlEditor.
This topic contains the following sections:
The igHtmlEditor control supports adding custom-defined toolbars. Custom toolbars currently support two types of controls:
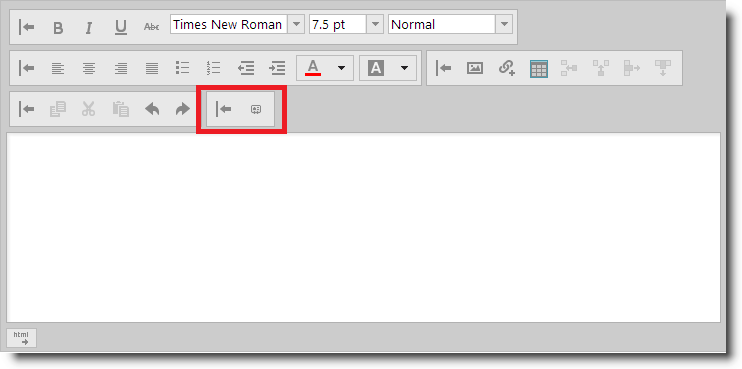
The following screenshot shows an igHtmlEditor with a custom toolbar defined with one button in it.
The following table lists the configurable aspects of adding a custom button to the igHtmlEditor control. Additional details are available after the table.
| Configurable aspects | Details | Options |
|---|---|---|
| Add button to custom toolbar | In order to define a button in a custom toolbar, add an object literal with the properties on the right to the items array of the customToolbars option. |
|
This procedure guides you through the process of adding a button to a custom toolbar in the igHtmlEditor.
In this example, the editor is used as an email editor and you define a custom toolbar and button which inserts an email signature into the content of the editor.
The following screenshot is a preview of the final result.
Following is a conceptual overview of the process:
1. Referencing the required scripts
2. Defining the CSS for the button
4. Defining the custom toolbar
6. Defining the button click handler
The following steps demonstrate how to add a button to a custom toolbar.
Reference the required scripts
Include mandatory references
References to the jQuery and jQuery UI JavaScript files are mandatory. Also, reference the Infragistics loader which is a quick way to load the required Infragistics resources:
In HTML:
 <script type="text/javascript" src="jquery.min.js"></script>
 <script type="text/javascript" src="jquery-ui.min.js"></script>
 <script type="text/javascript" src="infragistics.loader.js"></script>
Use the Infragistics Loader to load the igHtmlEditor files
Define the loader to reference the required igHtmlEditor files.
In JavaScript:
 <script type="text/javascript">
     $.ig.loader({
         scriptPath: "js",
         cssPath: "css",
         resources: "igHtmlEditor"
     });
 </script>
Define a CSS rule that applies an image as the button’s backround:
In CSS:
 <style type="text/css">
     span.ui-icon.ui-icon-contact
     {
         background-image: url(../content/theme/images/ui-icons_222222_256x240.png);
         background-position: -192px -128px;
     }
 </style>
The following code initializes the igHtmlEditor in the loader’s callback function:
In JavaScript:
 <script type="text/javascript">
     $.ig.loader(function () {
         $("#htmlEditor").igHtmlEditor({
             width: "100%",
             inputName: "htmlEditor"
         });
     });
 </script>
Define the "eMailSignature" custom toolbar which holds the button that appends an email signature to the editor contents.
In JavaScript:
 <script type="text/javascript">
     $.ig.loader(function () {
         $("#htmlEditor").igHtmlEditor({
             width: "100%",
             inputName: "htmlEditor",
             customToolbars: [
             {
                 name: "eMailSignature",
                 collapseButtonIcon: "ui-igbutton-collapse",
                 expandButtonIcon: "ui-igbutton-expand",
                 items: []
             }]
         });
     });
 </script>
The following code defines a button which adds an email signature to the contents of the editor.
Each custom button must be defined in the items array of the custom toolbar.
Below are the descriptions of the button options:
name – this option defines the name of the button.type – this option defines the kind of the toolbar item which we define. You should set it to “button” in order to define the button.scope – this option defines the execution scope of the click handler of the button. Set it to “this”.handler – this option defines the click handler. You can set it to the name of the function which will handle the click event.props – this is a compound object property which defines most of the button functionality. Here is the definition:
<customDefinedIdentifier> : {
    value: <valueToBePassedToTheActionHandler>,
    action: "<predefinedActionHandler>"
},
where:
<customDefinedIdentifier \> is a custom string literal used for API manipulation.
<predefinedActionHandler \> is the name of a handler and can be one of the following:
<valueToBePassedToTheActionHandler \> is the value passed to the action handler.
In JavaScript:
items: [{
name: "appendSignature",
type: "button",
handler: appendSignature,
scope: this,
props: {
   isImage: {
       value: false,
       action: '_isSelectedAction'
   },
   imageButtonTooltip: {
       value: "Insert signature",
       action: '_tooltipAction'
   },
   imageButtonIcon: {
       value: "ui-icon-contact",
       action: '_buttonIconAction'
   }
}
}]
Define the button click handler
Define the click handler of the button. This function appends a predefined string to the content of the editor.
In JavaScript:
 <script type="text/javascript">
     function appendSignature(ui) {
         var currentContent = $("#htmlEditor").igHtmlEditor("getContent", "html");
         var signature = "Jon Doe<br/>Acme Corp<br/>555-1111";
         $("#htmlEditor").igHtmlEditor("setContent", currentContent + signature, "html");
     }
 </script>
The following topics provide additional information related to this topic.
igHtmlEditor.The following samples provide additional information related to this topic.
View on GitHub